


What is Postman?
Postman is a user-friendly tool that simplifies API testing. It provides a graphical interface that lets you send requests, view responses, and debug APIs without needing to write code or use the command line.
Why use Postman?
Using Postman makes it easy to:
- quickly test APIs with a simple point-and-click interface
- save and organise API requests into collections for reuse
- experiment with different parameters, headers, and request types
- view structured responses (JSON, XML, etc.) instantly.
Installing Postman
Download and install Postman from the official website: https://www.postman.com/downloads/
Choose the version for your operating system (Windows, macOS, Linux) and follow the installation steps.
Testing one of our APIs in Postman
Step 1: Create a new request
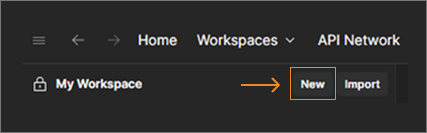
- Open Postman and click the New button next to the My Workspace column to create a new request.
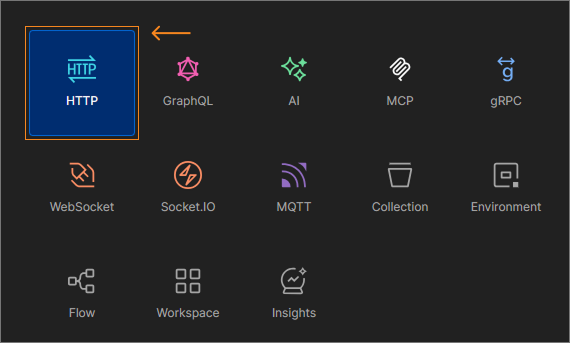
- Select HTTP from the list of available options.
Step 2: Set the request type
- You will see that GET is selected by default.
- Other common request types include
POST,PUT, andDELETEbut for this first request, we’ll useGET.
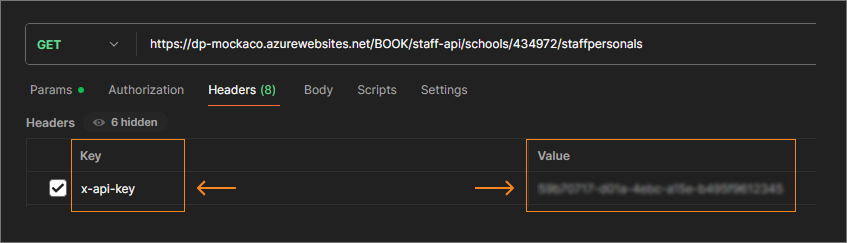
Step 3. Enter the request URL
- Set the URL to:
https://dp-mockaco.azurewebsites.net/BOOK/staff-api/schools/434972/staffpersonals - This calls the
/staff-api/schools/{zoneId}/staffpersonalsendpoint under the Booking System category.
Step 4: Add the API key header
- Go to the Headers tab.
- Add a new header:
- Key:
x-api-key - Value: (your API key from ‘My applications’)
- Key:
Step 5: Send the request
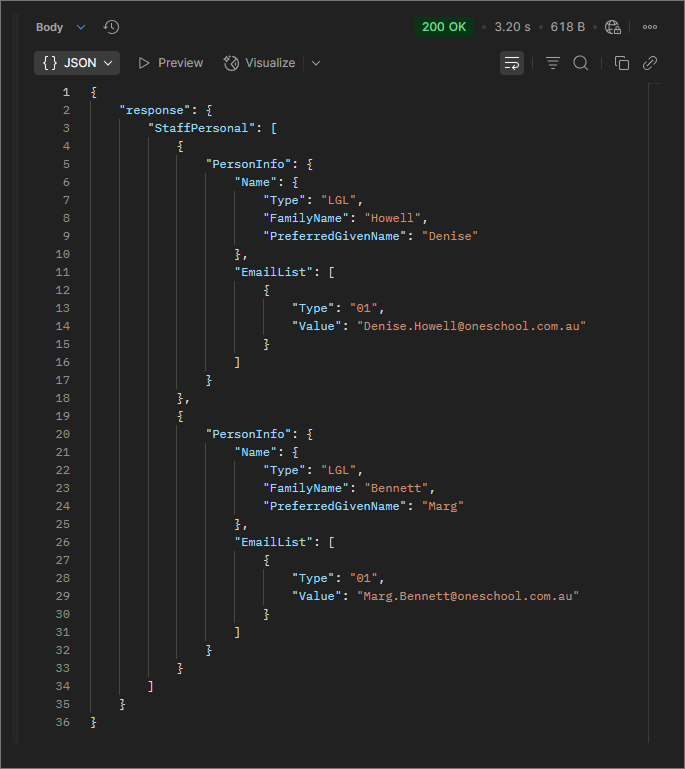
- Click Send (or Execute depending on your version).
- After a few seconds, you should see a JSON response from the server.
What’s next?
Now that you have successfully sent a GET request, try experimenting with:
- changing parameters in the URL (e.g., using a different
zoneId) - exploring other HTTP methods such as
POSTorPUT(when available) - saving your request into a Postman Collection for reuse later.
Tip 💡
You can also export and share your Postman collections with your team so everyone can test with the same setup.
